Doughnies: Brownie doughnuts

We have had the cronut (a croissant and a doughnut hybrid) they have been done to death and have thankfully passed on patisserie heaven.

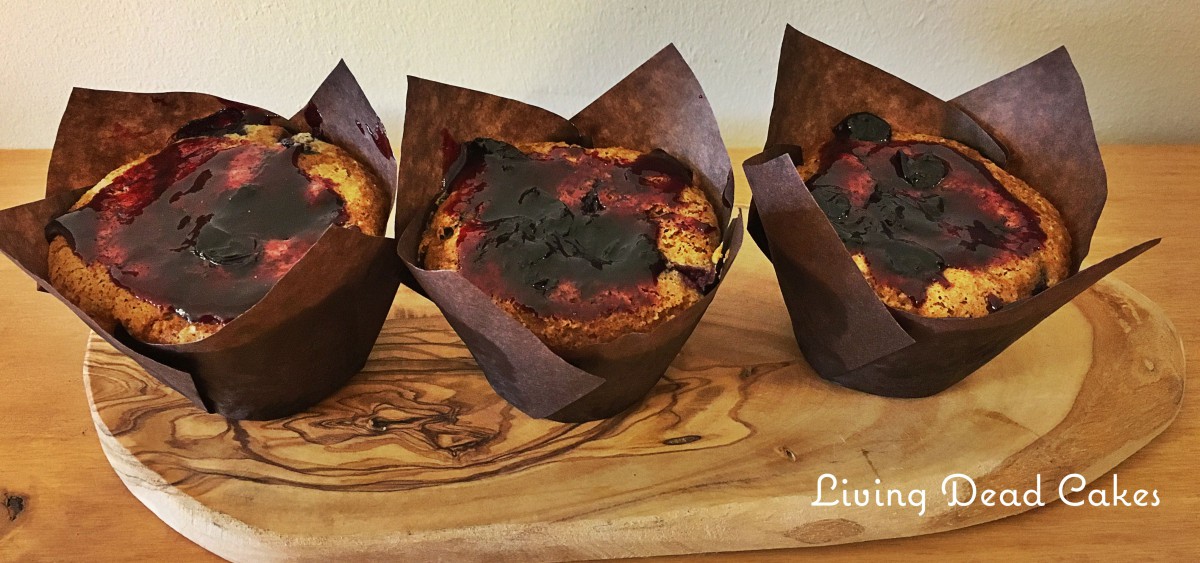
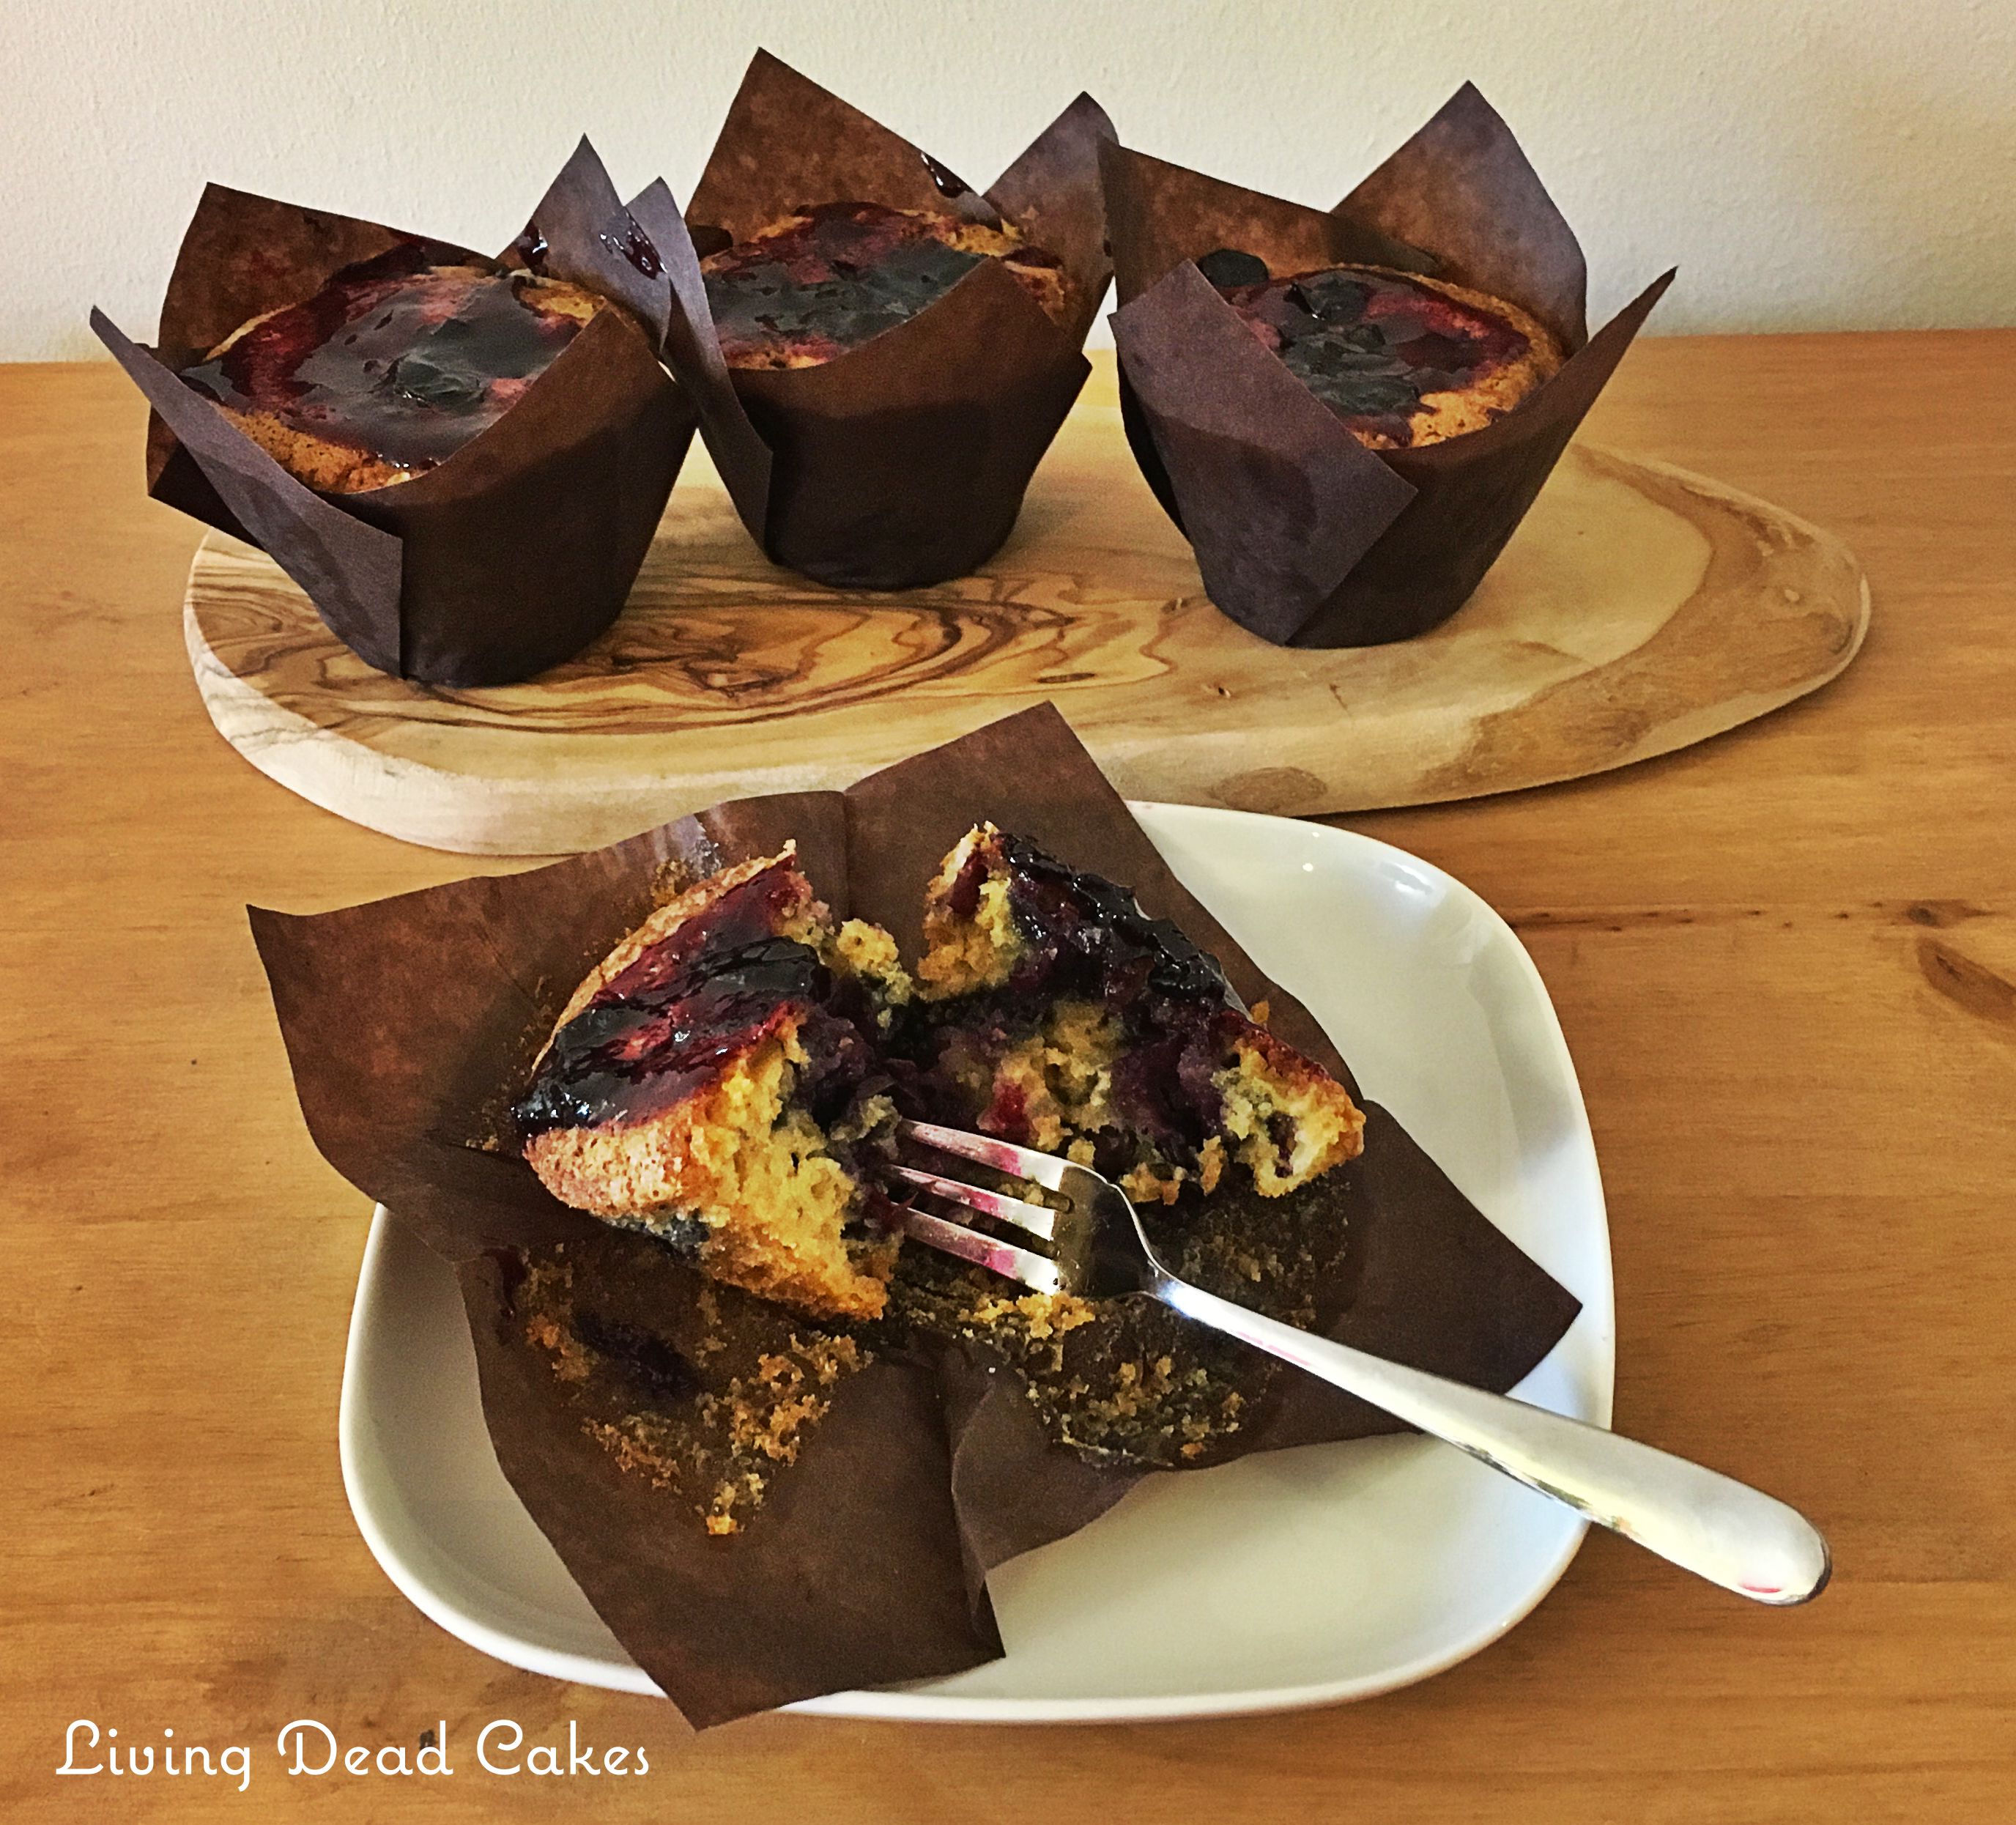
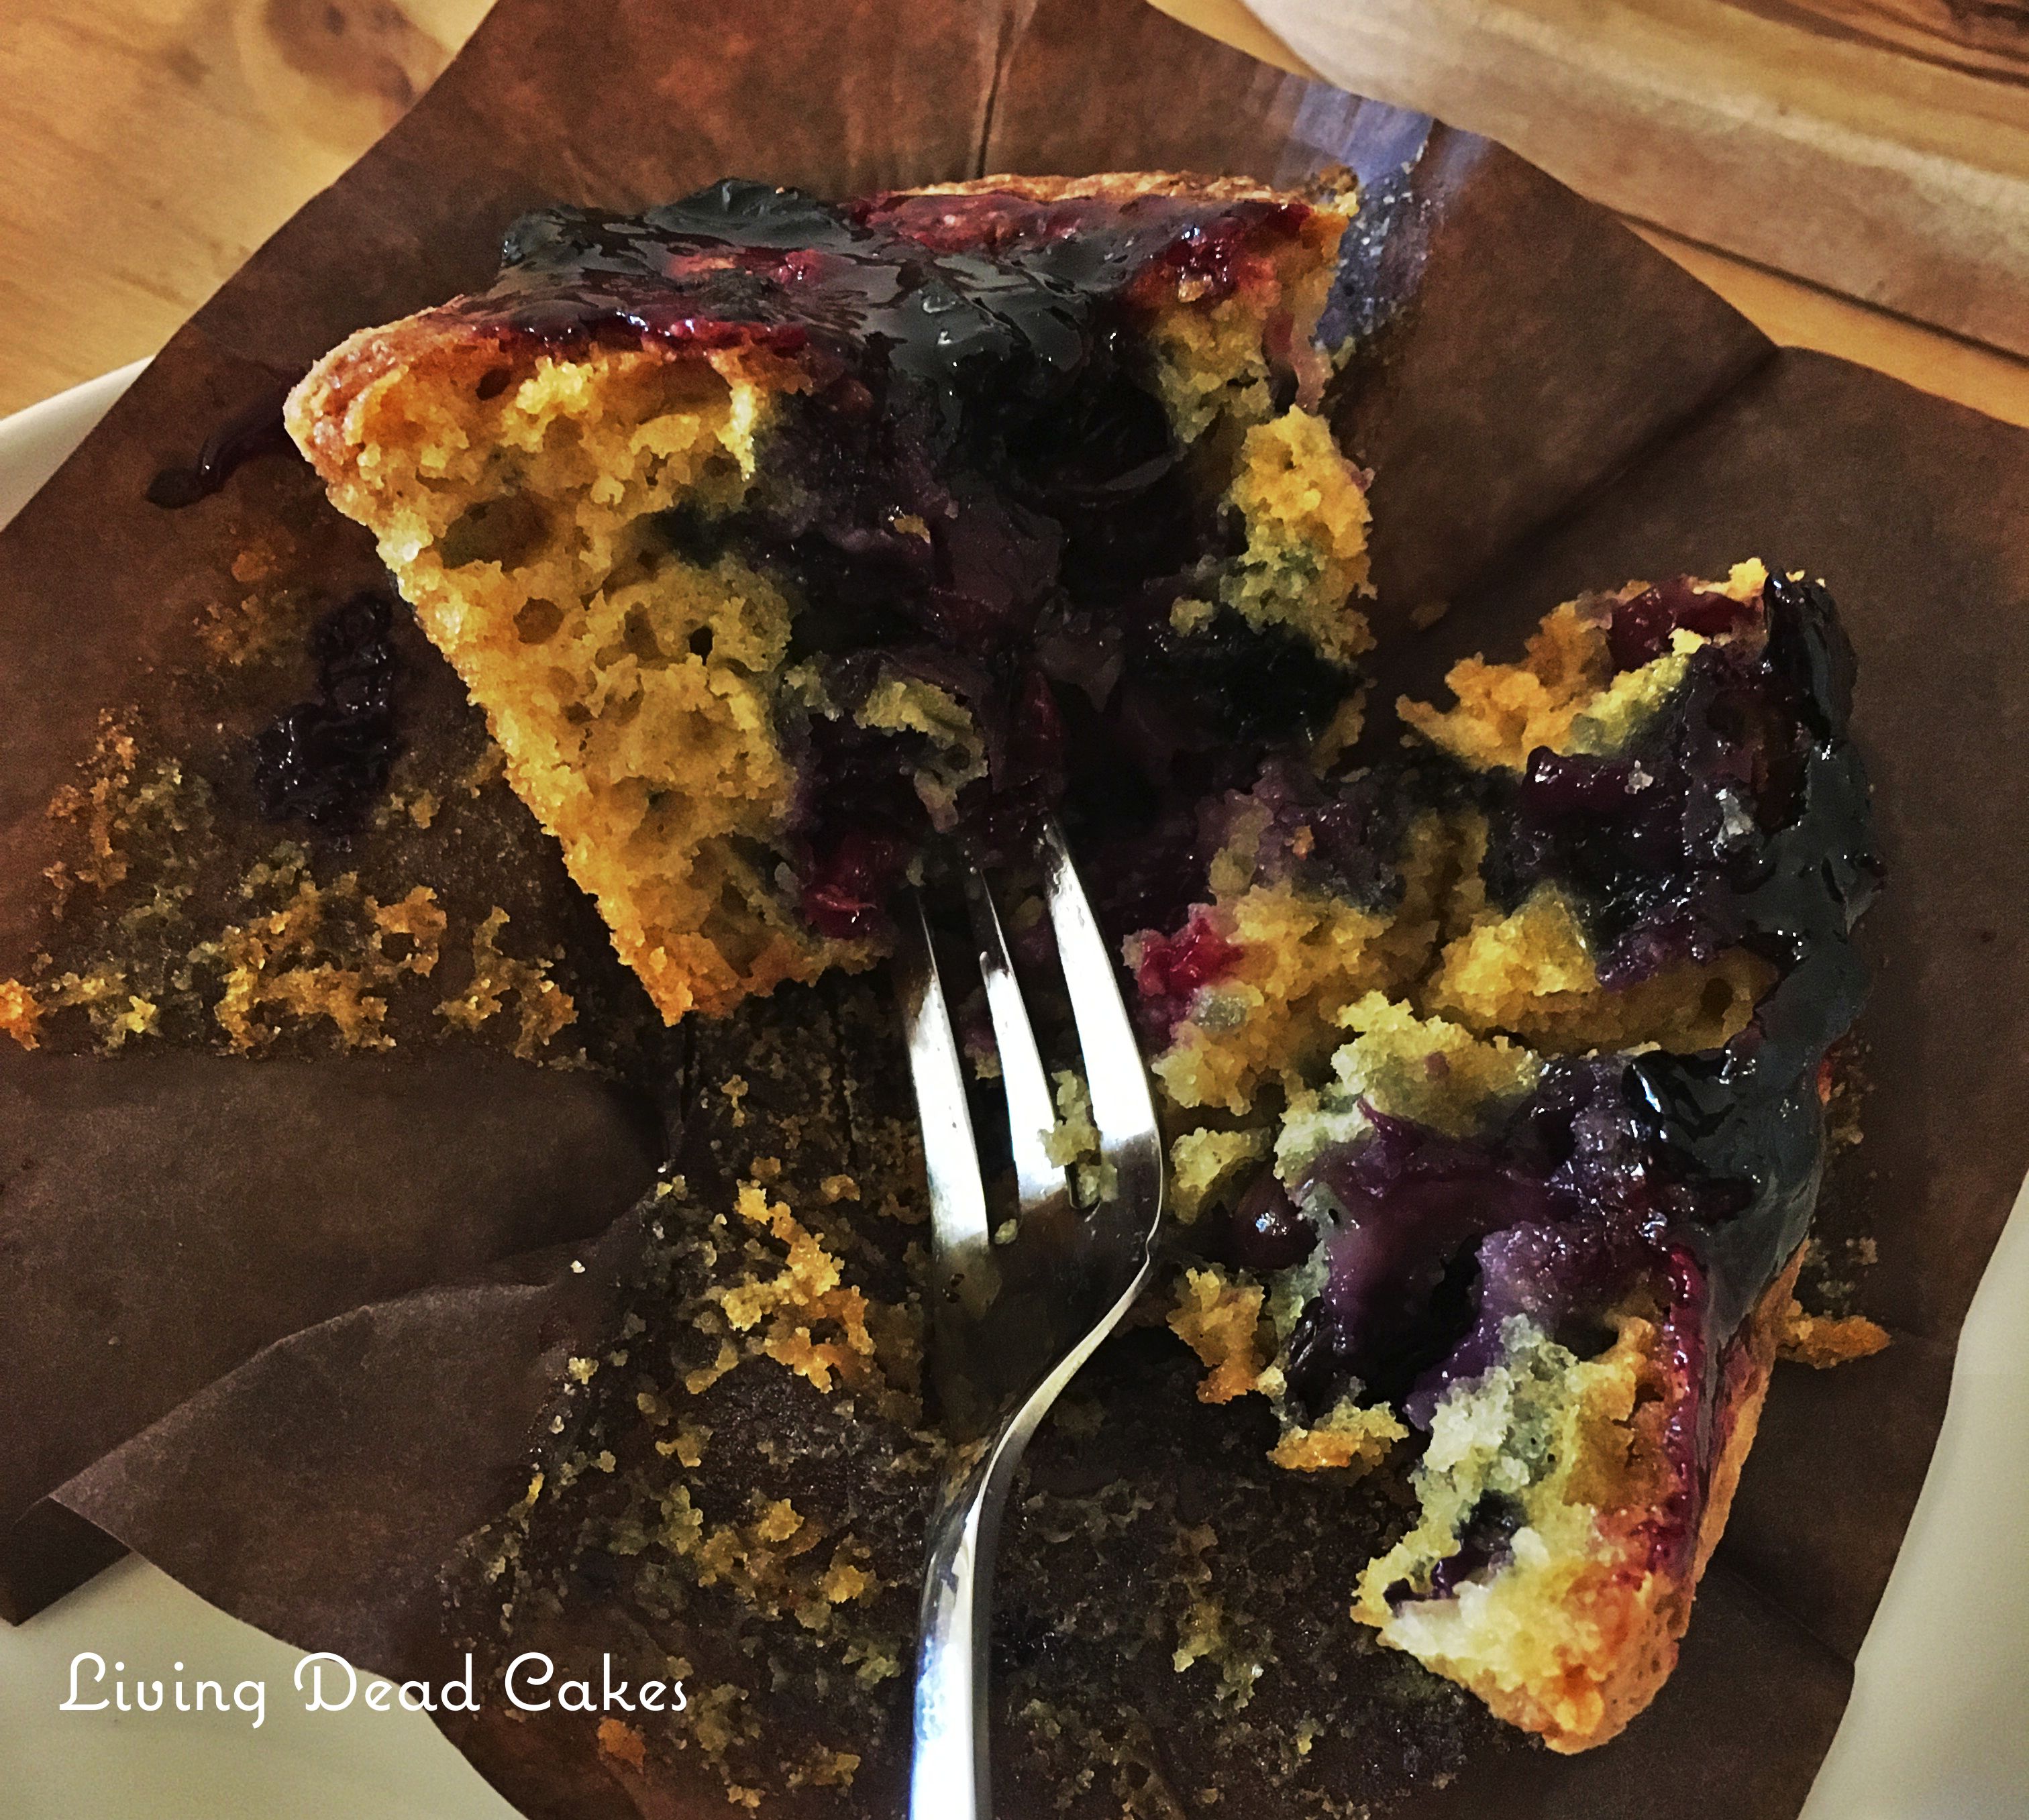
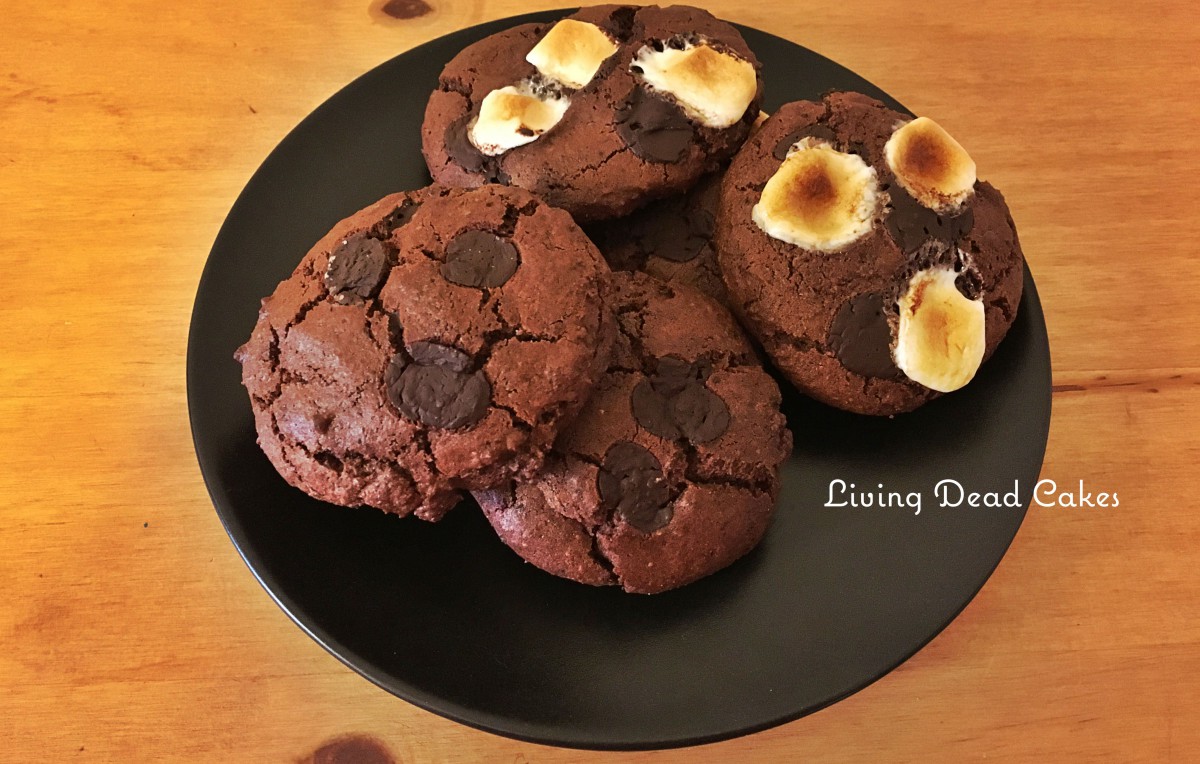
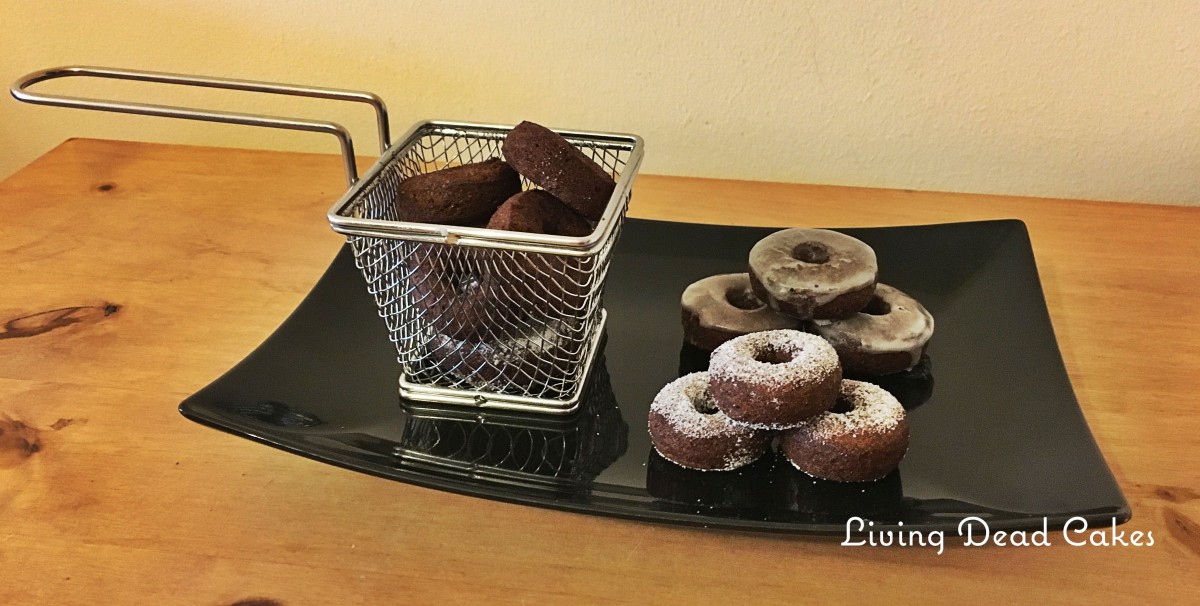
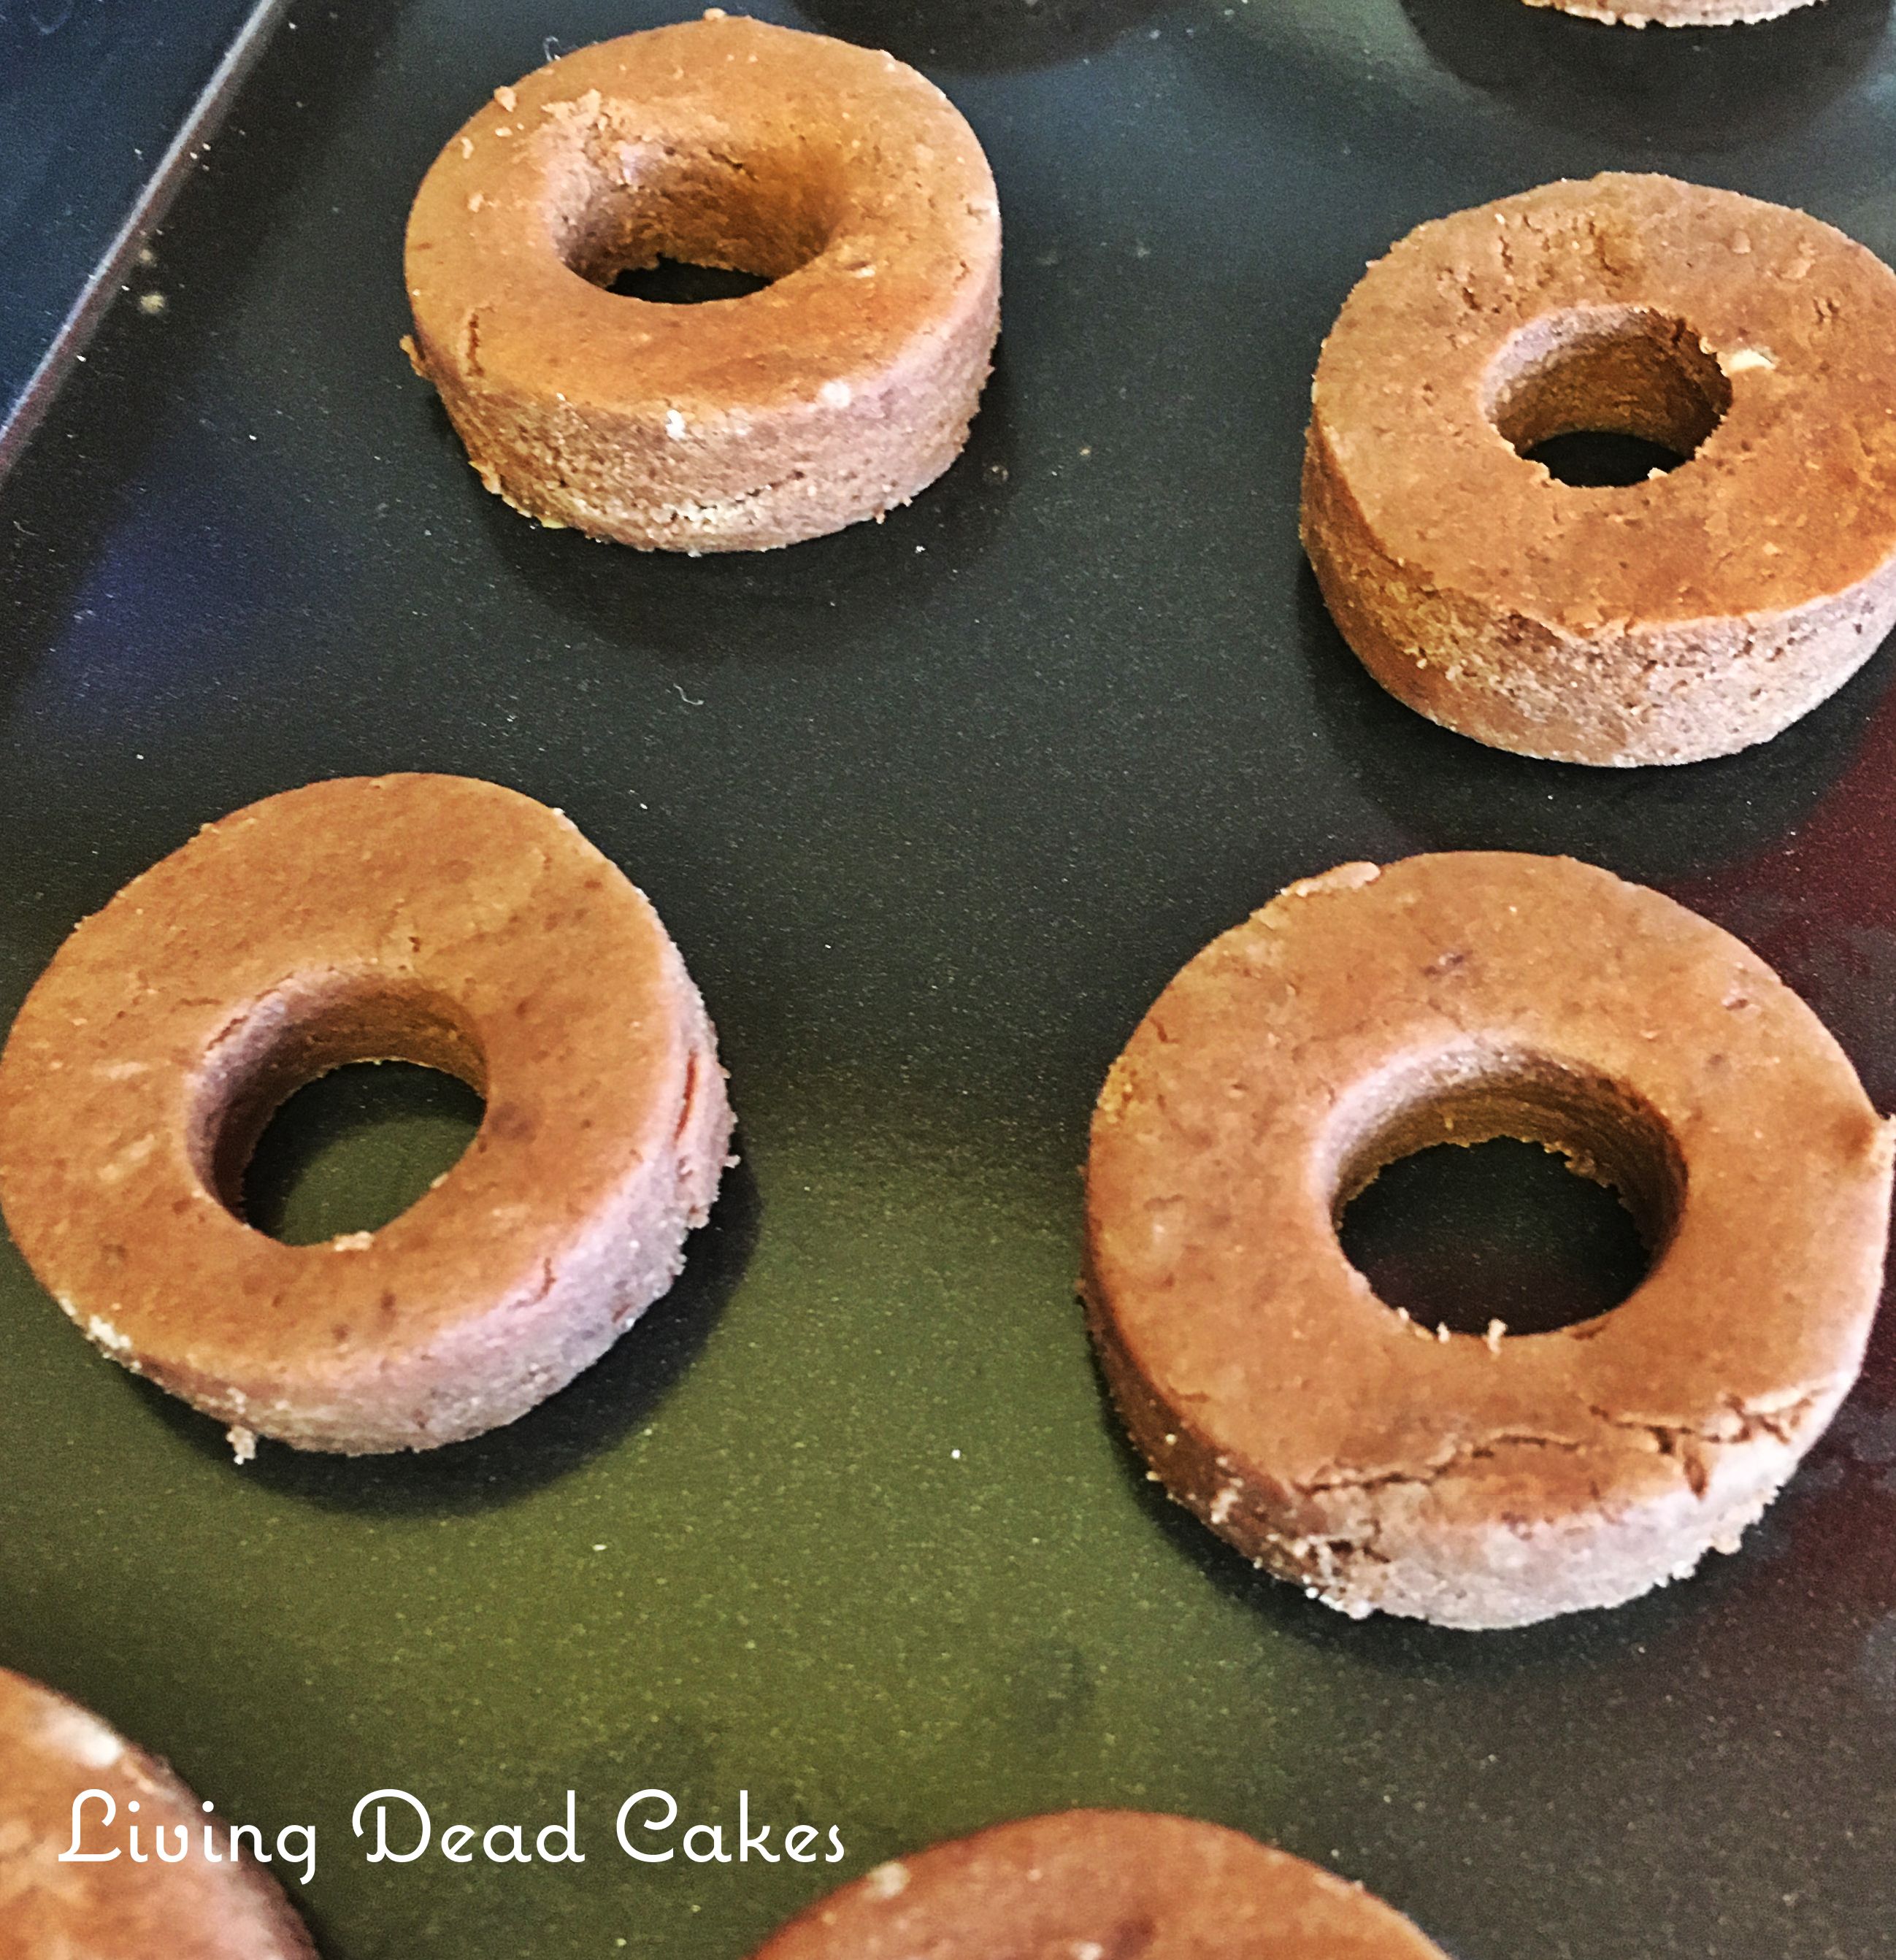
So I bring you the Doughnie, a brownie and doughnut hybrid, a soft fluffy doughnut crossed with the depth and decadence of a chocolate brownie.

closeup

A Living Dead Cakes exclusive creation.

I love brownies & I love doughnuts and since being gluten free I have missed doughnuts, sadly you can’t walk into Tesco and buy gluten free doughnuts.  Even though some doughnuts can be vegan (I think some co-op ones are) they are sadly not gluten free.
I wanted to make something that combined the two.

I have another vegan/gluten free doughnut recipe that’s more traditional I will upload that one soon.

Ingredients:

For the dough:

  • 300g Gluten Free self raising flour
  • 35g Cocoa powder
  • 2 Tsp baking powder
  • 40g Dairy free butter, melted
  • 120g sugar
  • 1 flax egg (1 Tbsp ground flax seed mixed with 3 Tbsp water)
  • 120ml Almond milk

For the glaze:

  • 120g icing sugar
  • 25ml Almond milk

Method:

For the dough:

  1. In a bowl sift together all your dry ingredients and place to one side
  2. In another bowl add your melted butter and sugar and beat well together add your flax seed and mix until well combine
  3. Now add half your dry ingredients and half the milk and mix, once combined add the the rest of the milk and dry ingredients and beat until you have a smooth dough
  4. This dough needs to chill for as long as you can allow it, an hour at least more if you can. Over night would be perfect.
  5. Once chilled roll your dough out to approx. 1/2” thick and cut out your doughnies, I made mine mini using 2 little round cutters, you can make them any size you like.dough
  6. Heat your oil too (350°F/180°C) and fry your doughnies, my minis ones took about 60 seconds to cook, if your doughnies are bigger then will take a few minutes on each side.
  7. Once they are cooked drain on kitchen paper to remove excess oil and either dip in the glaze or roll in sugar.

To make the glaze:

  1. Mix the icing sugar and almond milk together to form a lovely thick dip able glaze

These little doughnies will keep in an air tight container for a few days if they last that long.

closeup2

Velvet chocolate cookies

I know I have a chocolate cookie recipe up already but this one is just too good not to share, its velvety richness is what helped give these decadent cookies their name. and like my best cookies ever recipe these will make non vegans think twice that all we eat is rabbit food.

These little cookies are perfect topped with raspberries or blueberries. Just add a few berries to the top of the cookies just before you bake them.

Ingredients:

  • 200g Plain gluten free flour mix
  • 30g Cocoa powder
  • 1 Tsp baking powder
  • ½ Tsp Bicarbonate of soda
  • ½ Tsp salt
  • 115g Dairy free butter
  • 150g Soft brown sugar
  • 50g Caster sugar
  • 1 Tsp egg replacer mixed with 3 Tsp of warm water
  • 40g Chocolate Soya pudding
  • 50g Chocolate chips
  • ½ Tsp White wine vinegar

Method:

Pre-heat your oven to 200c/400f/ or Gas mark 6 and line a cookie sheet with non stick parchment paper 

  1. In a bowl swift together your flour, cocoa, baking powder, bicarbonate of soda and salt and move to one side.
  2. In another bowl beat together the butter and sugars until light and fluffy,
  3. add your egg replacer, chocolate soya pudding and mix until well combined,
  4. Now add your dry ingredients a little at a time mixing well,
  5. Once you have nearly added all your flour mix add your chocolate chips and white wine vinegar, and mix again
  6. The trick to these cookies is chilling the dough, you need to chill in the fridge for at least 1 hour two if you can
  7. Once chilled place spoon full of the cookie dough on a baking sheet and bake for 7-9 minutes
  8. When cooked move to a cooling rack and cool20160303_143744046_iOS

Emily Boo & my first YouTube review.

I have entered the world of YouTube and all the enchanting people that make videos & make up the YouTube community.

The delightful Emily Boo and her adorable little daughter have a made a fabulous review video of some yummy cakey delights, I sent Emily as a little thank you for her support.

I love Emily’s channel on YouTube and have watched her videos for over a year so I was truly honoured when she said she would make a video about the cakes I was going to send her.

Im not going to lie I was very scared I was worried she wouldn’t like the cakes or they would get trashed in the post but stepped up to the challenge and thought I would send her some of my favourite things I have made recently.

I had to think of things what would post well and hopefully wouldn’t get too squashed in the post & I wanted to try and send things that captured Emily’s bright personality & I knew from watching her videos that she was partial to a little chocolate.

So in the box i sent there was:

20160313_143604158_iOS

  • Fairy Jam, Mixed berries with edible sparkly glitter.
  • Peanut & chocolate Banana Cake,
    (Recpie is part of my 5 things to do with ripe bananas so its coming soon)
  • Creme flowers, But i made them blue & green, click here for the recipe 
  • Chocolate marshmallow cookies, click here for the recipe 
  • Chocolate sparkly mermaid push cakes with edible purple glitter
  • Chocolate velvet cookies, click here for the recipe
  • Chocolate zombie Hello Kitty cupcakes
  • & a Living Dead Cakes mug.

All 100% vegan and gluten free. 20160313_143001966_iOS

Sadly zombie kitty got a little squished in the post but Emily’s daughter still had a little nibble.

Here is Emily’s wonderful video.
Do not forget to like & subscribe.

I really do love her channel on YouTube and she also like Maleficent and Disney villains so anyone who likes Maleficent is ok with me.

Her videos range from alternative shopping hauls, to new tattoos, & OOTD’s,  Emily even documented her tattoo laser removal journey and the ups & downs and pain that it caused.

One of the reasons I love her channel and think Emily is lovely person all her videos are so honest and from the heart, You can see she really puts her all into her videos even though she has a little daughter a husband and a job she still finds time to upload good quality videos.

Some of my favourite Emily videos.

Random question tag.  A great video to get to know the wonderful emily

Dear 14 Year Old Me. I love the honesty in this video, what would you tell your 14 year old self?

Here are all Emily’s links so go like and subscribe to her and show her some love. ❤️ ❤️

Emily’s links

Thank you Emily & little Violet for the amazing video you made. ❤️

Its just a bunch of Hocus Pocus!!

We all have that one film that send us shooting back to our childhood, the one film that you can quote with out even having to think about it, for me one of my films is Hocus Pocus.

I was 12 years old when it came out and it ticked all the right boxes for me, Witchy, funny, had a cute black cat and amazing costumes, my inner baby bat loved it.  My little brother and i would watch it over and over and he even named his hamster Binx after the character Thackery Binx.  Our VHS copy of the film was well watched & loved.
So this film holds a special place in my heart.

On my every growing list of cakes that i want to make Winifred Sanderson’s spell book was one of them. Its now one cake that i can happily tick off.

I started by making my dark rich vegan/gluten free chocolate cake, filling it & covering it with my vegan caramel chocolate ganache and carving it into the shape of Winifred’s beloved book. Then the fun part I decorated it with fondant too look like her book, eye ball, fingers and stitches.

So here is the finished cake & all its missing is a dead mans toe………..

I haven’t done this one as a tutorial but in the summer i will be trying to make some YouTube tutorials.  In the mean time if people would like me to do the next big cakes I make as mini tutorials I can happily do that.
If you would like me to just click the link and send me a message.

HocusPocus1 hocuspocus3

hocuspocus4 hocuspocus5

hp8hp6

Find us on social media:

Facebook 

Instagram. 

YouTube. 

Twitter. 

A new giveaway will be coming soon………

Blueberry custard muffins

These delicious muffins are perfect for breakfast with a cup of tea on lazy Sunday morning. I love having these in the garden on a sunny morning while reading a book & waiting for my children to wake up.

If you don’t like blueberries you can make them with any berry I have made them with sour cherries and almonds (i will post the recipe soon) and there were just as delicious.

The soya yogurt gives these muffins a delicate vanilla custard flavour.
Perfect for a weekend treat.

You do not need a fancy mixer to make these either, a good old wooden spoon will do the job just fine.

muffins2

MY TIP: Add two spoonful’s of flour to the blueberries and toss them in the flour, this will help stop them sinking to the bottom when they bake.

Ingredients:

Makes 9-12 muffins

The muffins:

  • 110g Dairy free butter
  • 250g Caster sugar
  • 25ml Almond milk
  • ¼ Tsp Pink Himalayan salt
  • 1 125g pot of Alpro Vanilla Soya Dessert 
  • 1 tsp of egg replacer made up with 2 tsp warm water OR 1 Tbsp ground flax seed and 4 Tbsp warm water 
  • 300g Self raising gluten free flour
  • 1 Tsp Baking powder
  • 180g Blueberries

For the Jam:

  • 75g Blueberries
  • 65g Caster sugar
  • 2 Tbsp. Water
  • 1 Tbsp. Lemon juice

Method:

Pre heat your oven to 375°F/190°C or Gas mark 5

For the muffins:

  1. In a large bowl cream together the butter, sugar and almond milk until light and fluffy.
  2. Add the salt, Soya yoghurt, egg replacer or flax seed, flour and baking powder to your butter & sugar mix and mix well until you have a smooth batter.
  3. Fold in the blueberries and share your batter between your muffin cases and bake for 25-30 minutes until golden brown and a tooth pick comes out the centre clean.
  4. Leave too cool while you make the jam topping

For the jam

  1. In a saucepan add your blueberries, lemon juice and water and simmer for a few minutes to break up the berries,
  2. Add the sugar and simmer on a medium heat until the mixture thickens and the blueberries soften & pop, you end up with a lovely sticky jam.
  3. Once you are happy with your jam spoon a tea spoon of the warm jam on top of each muffin and leave them to cool.

You can eat these warm or cold they are lovely either way.

muffins3

Vampire slayer soup

I have had some requests for some more easy soup recipes. As many of you have really enjoyed my Butternut squash & chilli Soup.  I thought i would add another family favourite soup and my son even named this one.  He said it was so garlicky that it would kill vampires, so that is now what we call this one at home.

You can contact me via the contact form if you have any requests, I love getting messages from you all. 

I find a bowl of this soup is just enough for a lunch or a small meal, dispute being vegan it is so creamy & rich.

You don’t have to use smoked garlic if you can’t find any but I have seen it in many supermarkets, I buy mine from my local farm shop.

If you love garlic, you can add an extra glove or two, or for an extra garlic hit serve with garlic bread, its delicious with cheesy garlic bread.

Serves 4

Ingredients:

  • 850g Potatoes, peeled & chopped
  • 3 medium leeks, washed & chopped
  • 2 Tbsp. Garlic oil or Vegetable oil
  • 5 large gloves smoked garlic, chopped
  • 1 litre Vegetable stock*
  • 1 Tsp dried Thyme
  • Salt & pepper

Method:

  1. In a large pan heat your oil and sauté your leeks and garlic until the leeks are soft this will take a few minutes and while its cooking you can peel and chop your potatoes.
  2. Add your potatoes to the pan and pour over the stock, add your thyme and leave to simmer for 20 minutes or until the potatoes and soft and cooked.
  3. With a stick blender puree your soup and season with salt and pepper to taste.
  4. When i serve this i add a few extra grinds of fresh black pepper.

* I like this soup thick but you can add more vegetable stock if you would it to have a thinner consistency.

garlicsoupbowl-1024x831


I serve with lots of fresh ground black pepper and garlic bread.

?✅ key

?=Vegan

✅=Gluten Free

Caramel apple crumble

At this time of year people are embracing the winter weather and are having roast dinners, casseroles and other warm filling dinners.

My delicious caramel apple crumble is a perfect winter pudding & of course its vegan & gluten free.

I use a mix of Bramley apples and what ever eating apples I have in my fruit bowl.  In this crumble I had a few organic red Gala & some Organic Braeburn.  I like to use a mix of apples as the normal eating apples will break down and create a lovely apple purée, while the Bramley will hold their shape and add some texture to the warm apple base.

I used about a 25/25/50 mix of varieties of apples but you can use what ever ratio you like.

In my crumble I use a little nutmeg and a touch of vanilla.  As much as i love apples & cinnamon together they get paired in every traditional dessert so like any good couple they need a break at times. But trust me the apple, nutmeg & vanilla are a perfect match.

This recipe is a super easy recipe, even someone who can’t bake can make this, the hardest part of this recipe is peeling and coring the apples!

My tip: This recipe makes a very large crumble enough for 4-6 people, you can make one big dish or do like I do and make a few little ones and freeze the spare for another day.

Ingredients:

For the apple base.

  • 1kg Apples (peeled/cored & chopped into wedges)
  • 85g Soft brown sugar
  • 30g Dairy free butter
  • 2 Tsp Lemon juice
  • 1 Tsp Nutmeg
  • 2 Tsp. Vanilla extract

For the crumble

  • 120g Plain Gluten Free flour
  • 100g Gluten free oats
  • 60g Soft brown sugar
  • 80g Dairy free butter

Method:

Pre-heat your oven to 200c/400f/ or Gas mark 6

  1. In a large saucepan stir all your ingredients for the base and leave to simmer for 5-7 minutes, until the eating apples have broken down a little and the natural juice from the apples have created a lovely caramel sauce to coat them.
  2. In a bowl add all your crumble ingredients and with your finger tips rub in the butter until the mix looks like sandy breadcrumbs.
  3. Add the apple mix to your dish and spoon over the crumble mix.
  4. Bake for 20-25 minutes or until the crumble is golden brown and serve.

20160112_142027290_iOSwm

You can serve with either dairy free custard, salted caramel ice-cream or my toffee sauce from my sticky toffee pudding recipe.

?✅ key

?=Vegan
✅=Gluten Free

Crème Eggs (flowers)

I used to love crème eggs, Well I did before Cadbury’s changed their chocolate recipe & well I haven’t had a crème egg since being vegan.

I have made normal non vegan crème eggs before so I just had to change my normally recipe to a vegan one.

If you’re not vegan you can still make these, just use normal butter and whatever chocolate you like. My children like these made with galaxy or milky bar.

You can also add any flavour to the fondant in the middle. In the ones I made today I added some vanilla bean paste, but you can add a few drops of orange oil, rose water or peppermint oil.

I made mine today as flowers, using an ice cube tray from Ikea,
I do have an egg mould but it felt odd making vegan crème eggs as eggs,  we don’t eat eggs!!
So I made flowers! You can make any shape you like, if you don’t have an ice cube tray or mould you can roll balls of fondant and dip them into melted chocolate.

20160213_141639833_iOS

All the ingredients I used are from supermarkets so you don’t need any fancy ingredients.

Makes about 32 little flowers

Ingredients:

25g Dairy free white chocolate (I used some buttons from tesco)

300g Dairy free chocolate (I used Moofree)

85g Liquid Glucose

30g dairy free butter (I used Pure sunflower)

200g icing sugar*

1 Tsp water

1 Tsp Vanilla or any other flavouring you like

Some vegan food colouring I used Wilton

My Tip
*if you are not using a mould and are rolling balls of fondant you will need to add an extra 100g of icing sugar to make it a little thicker.

**See the end of the method if your rolling balls.

Method:

First you need to get your ice cube trays ready.

Melt the white chocolate in the microwave in short 15 second bursts until its melted, once melted add a little food colouring with a toothpick and mix in until you get the colour you like.

Add little drops of the melted chocolate to the centre of the flower and place in the fridge to set.20160213_112502240_iOS

Now melt your other chocolate in the same way 15/20 second bursts in the microwave until melted.

Add half a teaspoon of chocolate to each flower and using a small paint brush, brush the chocolate up the side of the mould and tap the mould to make sure there are no air bubbles.

Place in the fridge to set while you make the fondant centre.

The Fondant centre.

First add your butter and liquid glucose to your mixer and beat them together, you can do this with a stand mixer or a hand held mixer.

Once thick and creamy add your icing sugar, 1 teaspoon of water, your flavouring & colouring and mix together until all combined.

20160213_114250443_iOS

Take your mould out of the fridge and fill each flower with a little of the fondant make sure to leave a little gap so you can fill the top with more melted chocolate.

Once they are all filled place back into the fridge and re melt your chocolate

Fill the tops of the mould with extra chocolate and set in the fridge.

Once set tip carefully remove from the moulds

20160213_142037769_iOS

**If you are making without a mould

Chill your made fondant in the fridge for 15 minutes to make it easier to roll.

Once cold using damp fingers and a tea spoon roll your fondant into balls and place on a tray lined with non-stick parchment.

Chill for another 15/20 minutes.

Once cold melt your chocolate and using two forks dip your balls of fondant in the chocolate and place back on the lined tray.

You can sprinkle any sprinkles you like on them or even some grated chocolate  when the chocolate is wet

Chill to set the chocolate


Cottage pie potatoes

Cottage or shepherds pie was the one meal I hated as a child. We all have those meals that our parents used to make that we hated, the one meal that would instil dread when we heard that was what was for dinner.  This meal was mine.

When i was little i wasn’t a fan of plain mashed potatoes i liked creamy rich cheesy mash, so i think thats why i didn’t like it, but we all know children can be fussy little things.

I can promise that you will love this, its absolutely delicious.
It is perfect served with some some tender steam broccoli on the side & some extra gravy poured all over.

Best of all this recipe is 100% vegan and gluten free.

Serves 4:

Ingredients:

  • 4 Large baking potatoes
  • 2 Tbsp. vegetable oil
  • 2 large carrots, peeled & diced
  • 1 Medium white onion, peeled & diced
  • 1 Red pepper, diced
  • 1 Clove of garlic, crushed
  • 250g Soya mince (or dehydrated soya chunks)
  • 2 Tbsp. Tomato puree
  • 450mls Gravy*
  • Salt & pepper
  • A few dashes of Worcestershire sauce (I used Tiger)
  • Knob of dairy free butter
  • Splash of almond milk
  • 25g vegan cheese, grated (I used Violife)
  • Salt & pepper
  • Tender steam broccoli or green beans for serving

*My Tip, I use Free & Easy Vegetable Gravy Sauce Mix. As its vegan and gluten free, I do add an extra few spoons of the mix to make it a little richer.

Method:

Pre-heat your oven to 200c/400f/ or Gas mark 6

  1. Prick your baking potatoes and microwave until they are cooked (time will vary depending on the size of your potato’s) and leave to one side to cool a little.
  2. In a large saucepan sauté the onions, garlic, peppers and diced carrots in the oil until they are soft.
  3. While the vegetables are cooking slice the top of the potato length ways & scoop out the potato in the middle, be careful not to rip the skin, once you have done all the potatoes you can turn the scooped out potato into the mash topping, add the butter, milk, salt & pepper, and vegan cheese and mix. Leave to one side.
  4. When your vegetables are soft, add the soya mince, tomato puree, 350 mls of gravy, Worcestershire sauce and leave to simmer for 25 minutes on a low heat, you want it to reduce so there isn’t much gravy left and its all rich and dark.
  5. If you would like your potato skins to be a little crunchy then bake them in the oven for 5 minutes while the filling is reducing
  6. When your filling has reduced scoop the filling into the potato skins and top with mash, you can either pipe your mash on our just put in on with a spoon.
  7. Bake in the oven for 25/30 minutes until the mash is golden brown and crispy
  8. Serve with your green vegetables and a little extra gravy.

My tip, You can make these in advance and leave in the fridge & bake as step 7 just in time for dinner. 

Cottage potatoes


The best chocolate chip cookies ever!

These cookies remind me of the Friends episode, The One with Phoebe’s Cookies.
Monica wants Phoebe’s grandmother’s secret chocolate chip cookie recipe so that she can make the best chocolate chip cookies ever for her future children.

This recipe didn’t take a million tests,  batch 16 didn’t make anyone sick, & Nesele Toulouse didn’t give me the recipe, you just read that how Phoebe said it didn’t you? Don’t lie i know you did!.  Its just my normal cookie recipe made vegan, but they do get called the best cookies ever when people try them.

They are soft, fluffy & a little gooey and you can top them with any chocolate you like, buttons, marshmallows even cut up chocolate bars.

cookie3

Ingredients:

  • 115g caster sugar
  • 85g Dairy free butter
  • 1 flax egg*
  • 115g Self raising gluten free flour
  • 30g Cocoa powder**
  • 30g Vegan Dark chocolate chips
  • 35ml Dairy free milk (soya, almond ect.)
  • Extra chocolate chips/Vegan marshmallows*** for the top

*Make your flax egg by mixing 1 Tbsp. of ground flax seed with 2 Tbsps. of water in a bowl and leave to the side for 5 minutes.

**I always use Green & Blacks Organic cocoa

***I used Freedom vegan marshmallows cut in half.

Method:

Pre-heat your oven to 200c/400f/ or Gas mark 6 and line a cookie sheet with non stick parchment paper 

 Makes approx. 8 cookies depending on size. 

  1. Cream your butter & sugar until light and fluffy.
  2. Add the flax egg and mix until combined
  3. Once combined add the rest of the ingredients & mix well, This cookie dough is very soft & sticky so don’t worry if your dough is looking too sticky
  4. Place the mix in a bowl and chill in the fridge for 20/30 minutes
  5. Once chilled roll the dough into golf ball size balls and place them on a cookie sheet about 1.5″  apart as they don’t spread much, but they do puff up.
  6. With your fingers flatten the ball of dough and top with a few extra chocolate chips or some vegan marshmallows
  7. Bake for 8-11 minutes and leave to cool completely on the tray before removing.

These are even yummier in a bowl with some ice cream.

My tip: When making your cookie dough balls damp/wet hands will stop the dough sticking to your hands

cookie2


✅? key

?=Vegan

✅=Gluten Free